How to Use a Wooden Massage Roller
Most beginners focus first on choosing the right roller. In practice, pressure, pace and control matter at least as much as shape.
A suitable roller used too firmly can become uncomfortable. The same tool, moved slowly with a secure grip and lighter pressure, is easier to control.
You do not need a long or forceful routine. Start with one easy-to-reach muscular area, keep the first session short and let comfort guide the pressure.
Quick answer
Inspect the roller, then choose one healthy and comfortable area to test. Use it over thin clothing, or apply a small amount of suitable massage oil or lotion to bare skin. Hold both handles securely, begin with light pressure and move slowly over muscle rather than bone, joints or the spine.
About one minute is enough for the first test. Continue for up to two minutes only if the pressure remains comfortable and the skin responds normally. Stop for sharp pain, numbness, tingling, unusual sensitivity, irritation, bruising or swelling.
Beginner checklist
Before the first stroke:
- Inspect the roller for cracks, splinters, roughness or loose parts.
- Choose an easy-to-reach muscular area.
- Start with light pressure and normal breathing.
- Keep the first session short.
- Stop if discomfort increases or the area feels numb or irritated.
- Wipe and fully dry the roller after use.
Before you start
- Check the tool. Do not use it if the wood is cracked, splintered, rough, loose or damaged, or if the rollers do not move as intended.
- Check the skin. Avoid cuts, rashes, irritation, fresh bruises, sunburn, swelling or an area that is already painful.
- Choose one area. A calf, thigh or another broad muscular area is easier to assess than a full-body routine.
- Choose a stable position. Relax the area and keep both handles under control without twisting.
- Choose the glide. Use thin clothing, or apply a small amount of suitable body oil or lotion to bare skin.
One area is enough for a first session. It gives you a clearer sense of the pressure, surface feel and any delayed soreness or irritation.
How to use a wooden massage roller step by step
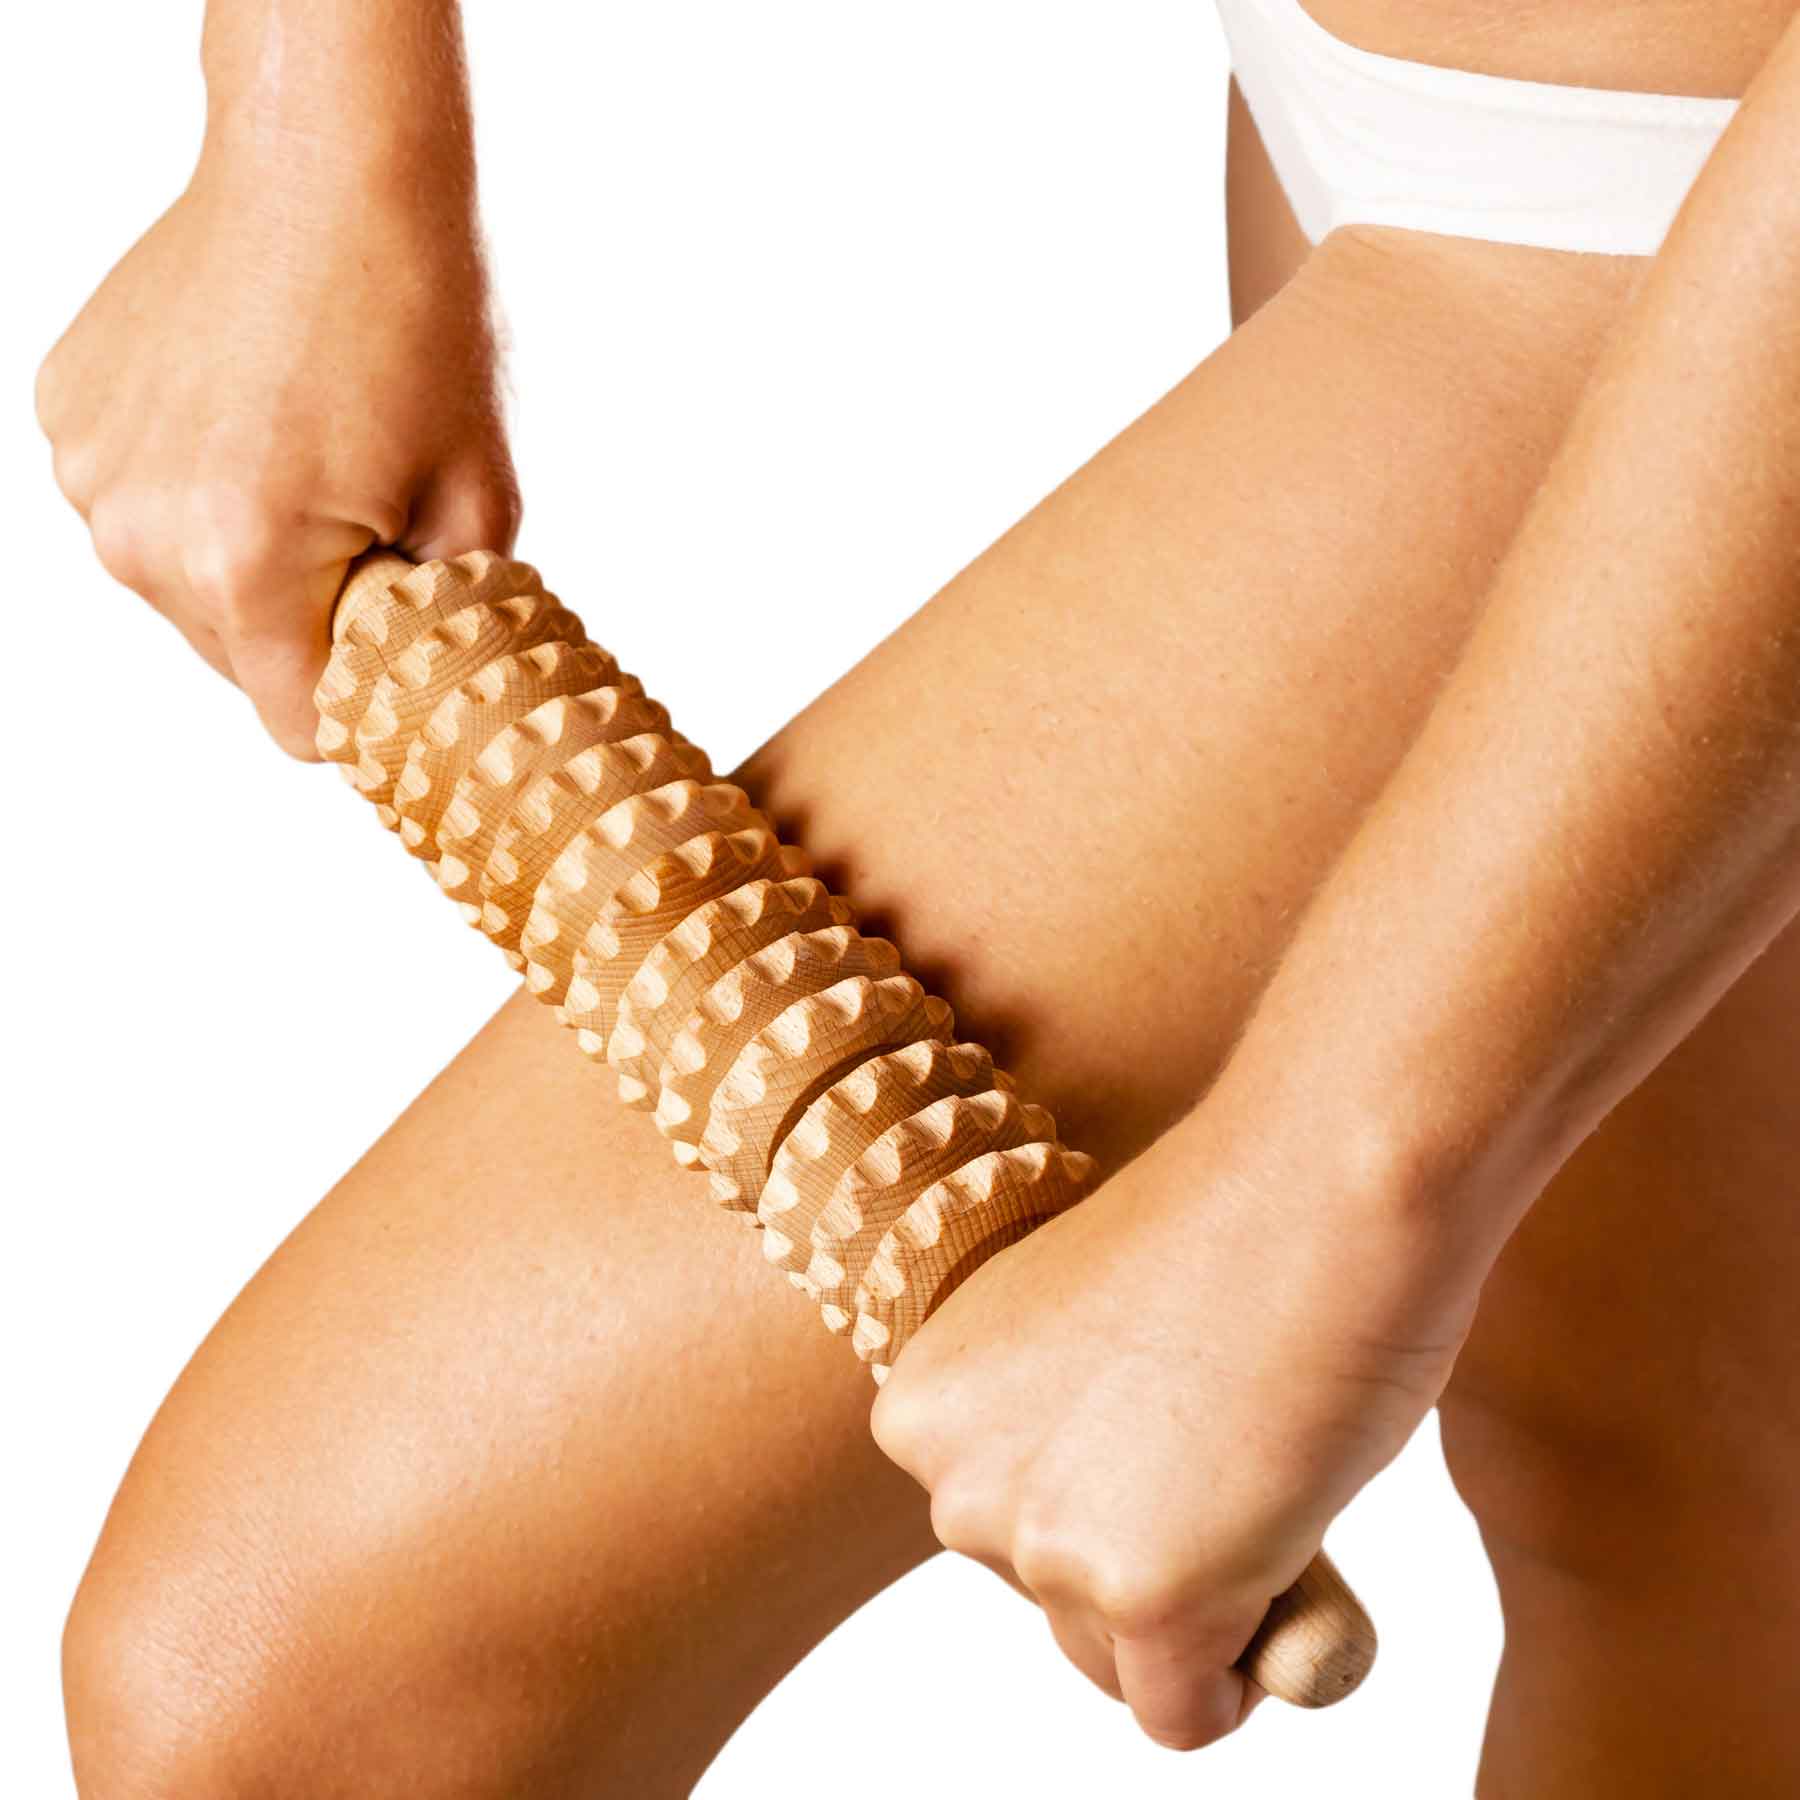
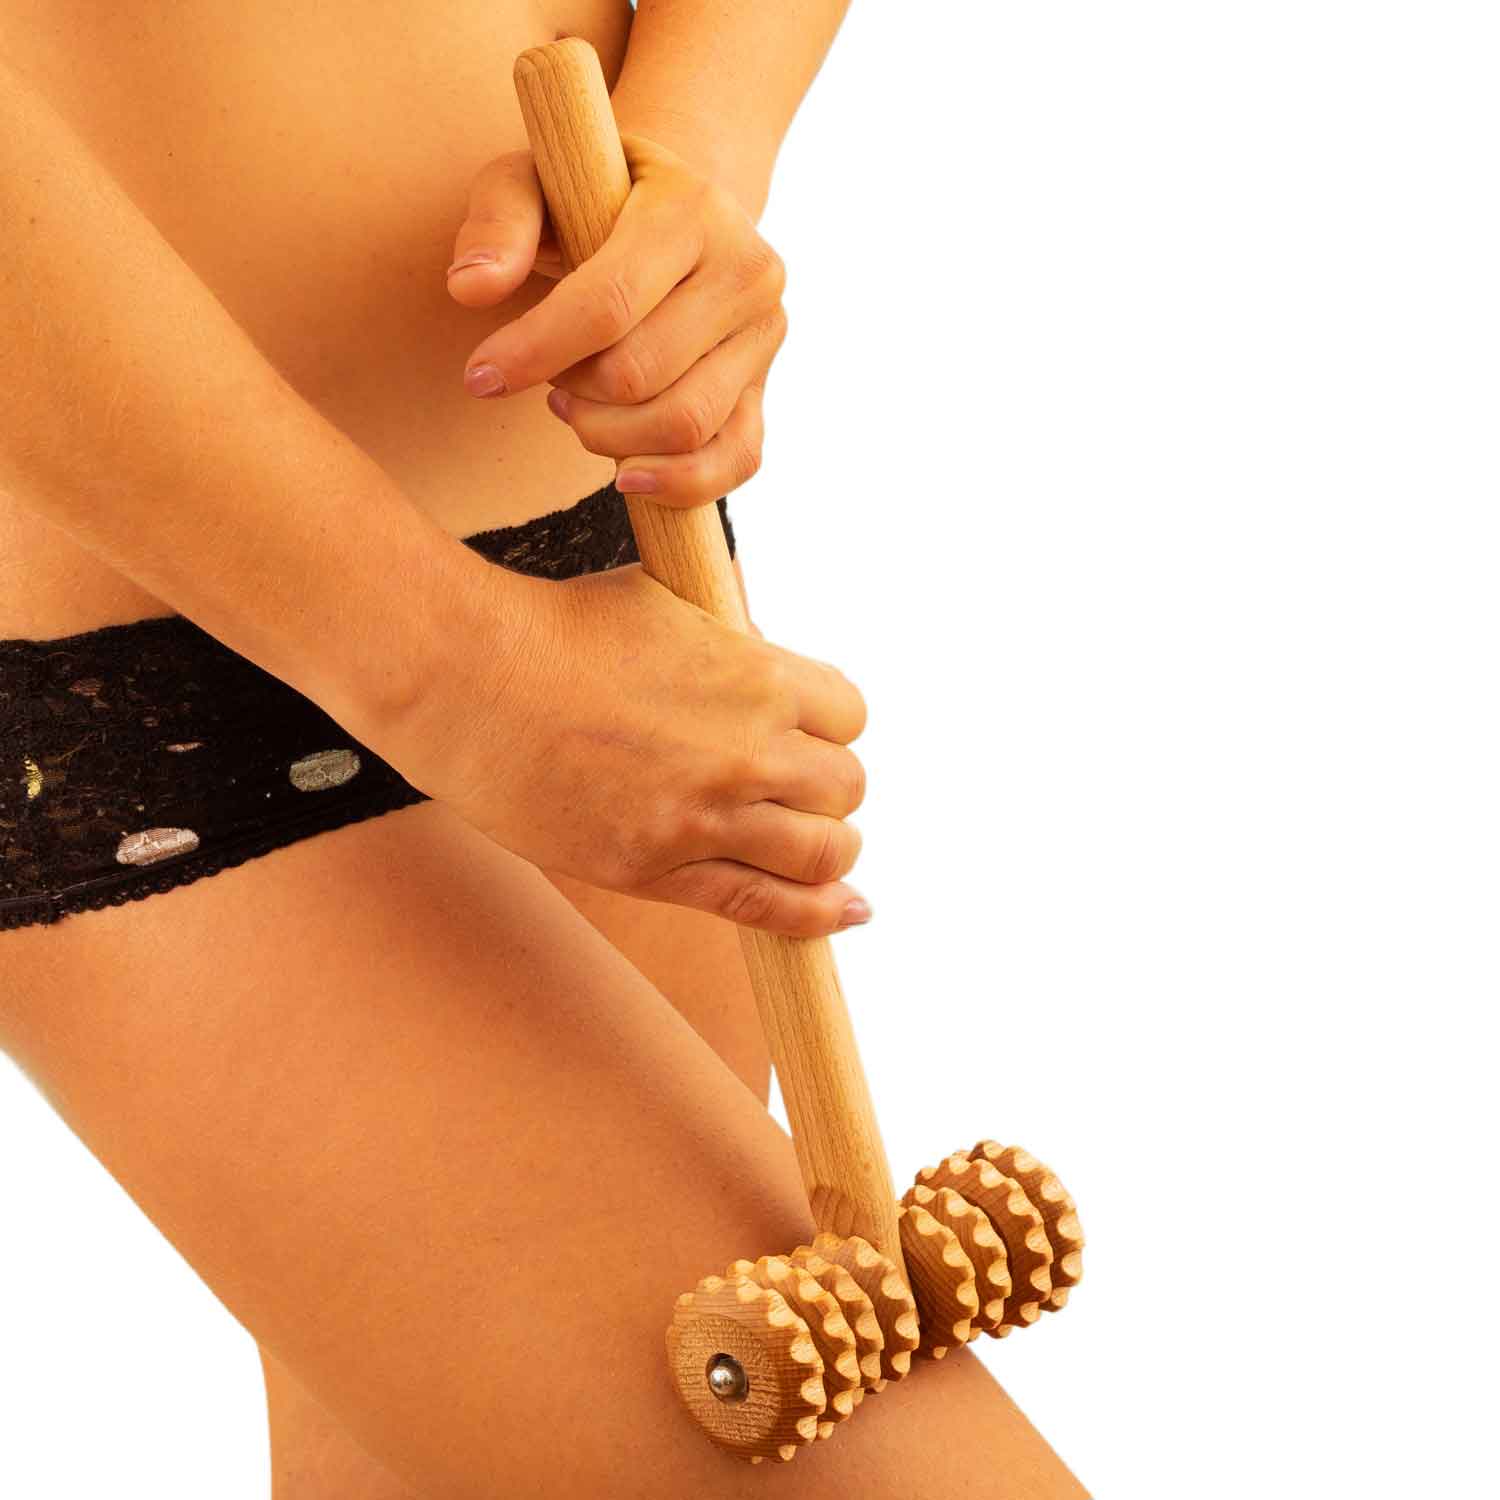
1. Hold both handles securely
Keep your wrists comfortable and use your grip to guide the tool, not force it down. Oil or lotion belongs on the skin, not on the handles. A dry, secure grip gives you better control on both the forward and return stroke.
2. Place it on a broad muscular area
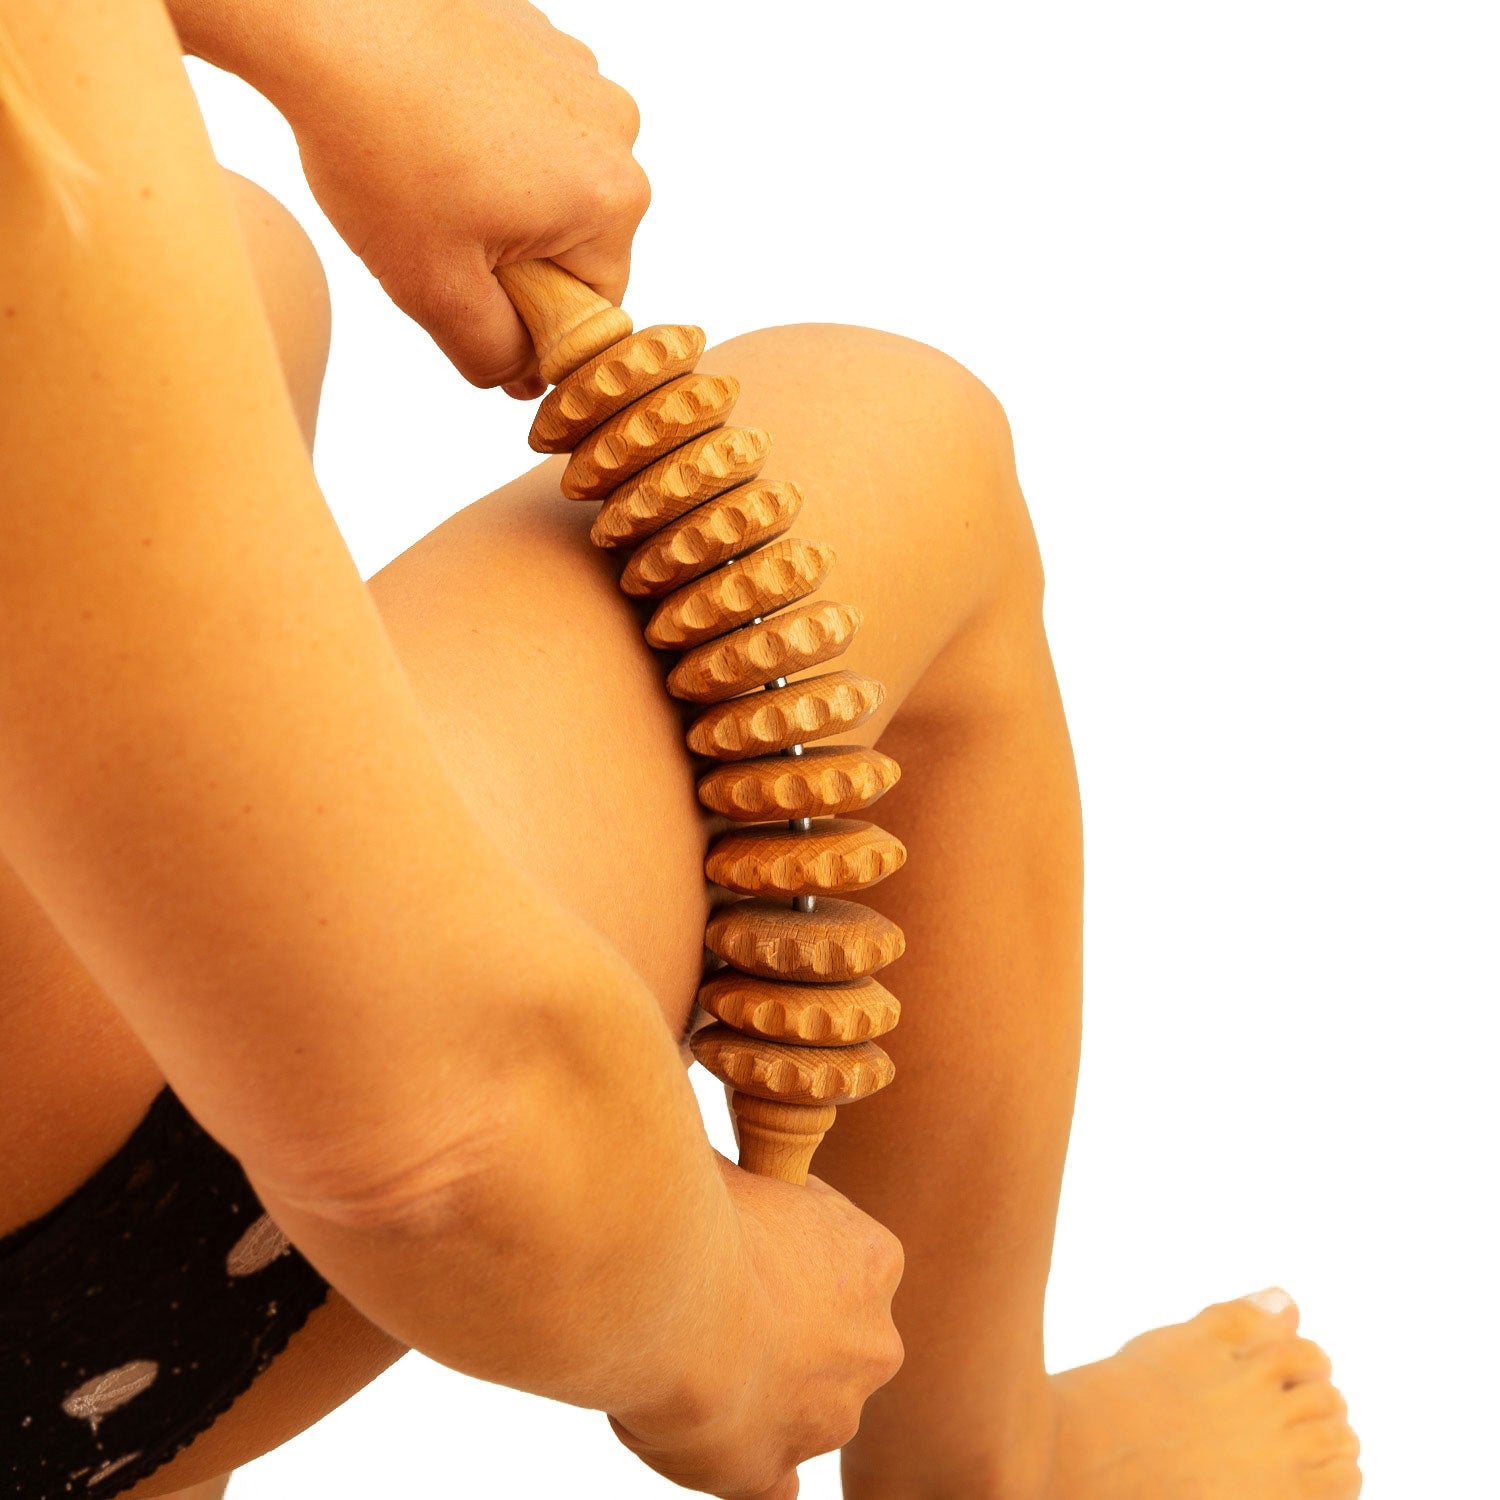
Start somewhere easy to reach, such as the front or outer thigh. Set the roller gently against the area before moving it.
Keep it on broad muscle. Avoid kneecaps, shinbones, hip bones, joints, shoulder blades, ribs and the spine.
3. Test with light pressure
Roll through a short path two or three times. The contact should feel clear but comfortable, with relaxed muscles and normal breathing.
Reduce pressure if you tense, hold your breath or pull away. A light test helps you assess both the body area and the roller surface.
4. Use slow, controlled strokes
Move back and forth over the selected muscle. There is no need to rush or follow a universal direction such as always rolling towards the heart.
Use the path that gives you stable contact and comfortable pressure. Keep the roller moving instead of repeatedly pressing one tender point.
5. Keep the first use short
Start with about one minute. Continue for up to two minutes only while the area remains comfortable.
Treat this as a short practical test, not a therapeutic dose. Longer or harder use is not automatically better.
6. Reassess before changing areas
Pause before moving elsewhere. Check how the area feels and looks. A little temporary warmth or light redness may occur from friction, but the area should not feel painful, numb, swollen or bruised.
For a first routine, one or two areas are enough.
A simple first routine
- Roll one calf for 30 to 60 seconds with light pressure.
- Roll the front or outer thigh on the same side for about 60 seconds.
- Pause and check how both areas feel.
- Repeat only if the movement remains comfortable.
- Wipe and fully dry the roller afterwards.
This is an example, not a required sequence. Starting with only one area is also reasonable.
How much pressure should you use?
Pressure should be based on comfort and control, not on how hard you can press.
| Pressure level | What it feels like | What to do |
|---|---|---|
| Light | Clear contact, easy movement and relaxed breathing | Best starting level and the default for unfamiliar areas |
| Moderate | More noticeable contact, but still comfortable and controlled | Use only after a light test and reduce it if tenderness develops |
| Too strong | Sharp pain, burning, breath-holding, numbness, tingling, marked irritation, bruising or swelling | Stop. Discomfort and bruising are not proof that the roller is working |

Textured designs can feel more pronounced under the same hand pressure. Start lighter with Dice or Body surface variants and judge the contact before adding pressure.
A useful rule is simple: if you cannot breathe normally, cannot keep the area relaxed or cannot control the return stroke, the pressure is too high.
How long and how often should you use it?
There is no universal clinically established session length for a handheld wooden roller. Shape, pressure, body area and individual sensitivity all matter.
A cautious starting approach is:
- about one minute on one area;
- up to two minutes if it remains comfortable;
- one or two areas in the first routine;
- check the area later that day and the next day before repeating it.
Brief regular use may be reasonable when it remains comfortable, but daily use is not required. Change only one variable at a time. If you lengthen the session, do not also increase the pressure and frequency.
Reduce the frequency or stop if the area becomes persistently sore, sensitive, irritated, numb or bruised. For more detail, read Can You Use Wood Therapy Tools Every Day?.
How to use a wooden roller by body area
Keep the area relaxed and use a short path you can control. This is general product guidance, not treatment for pain or injury.
| Area | Suggested movement | Avoid |
|---|---|---|
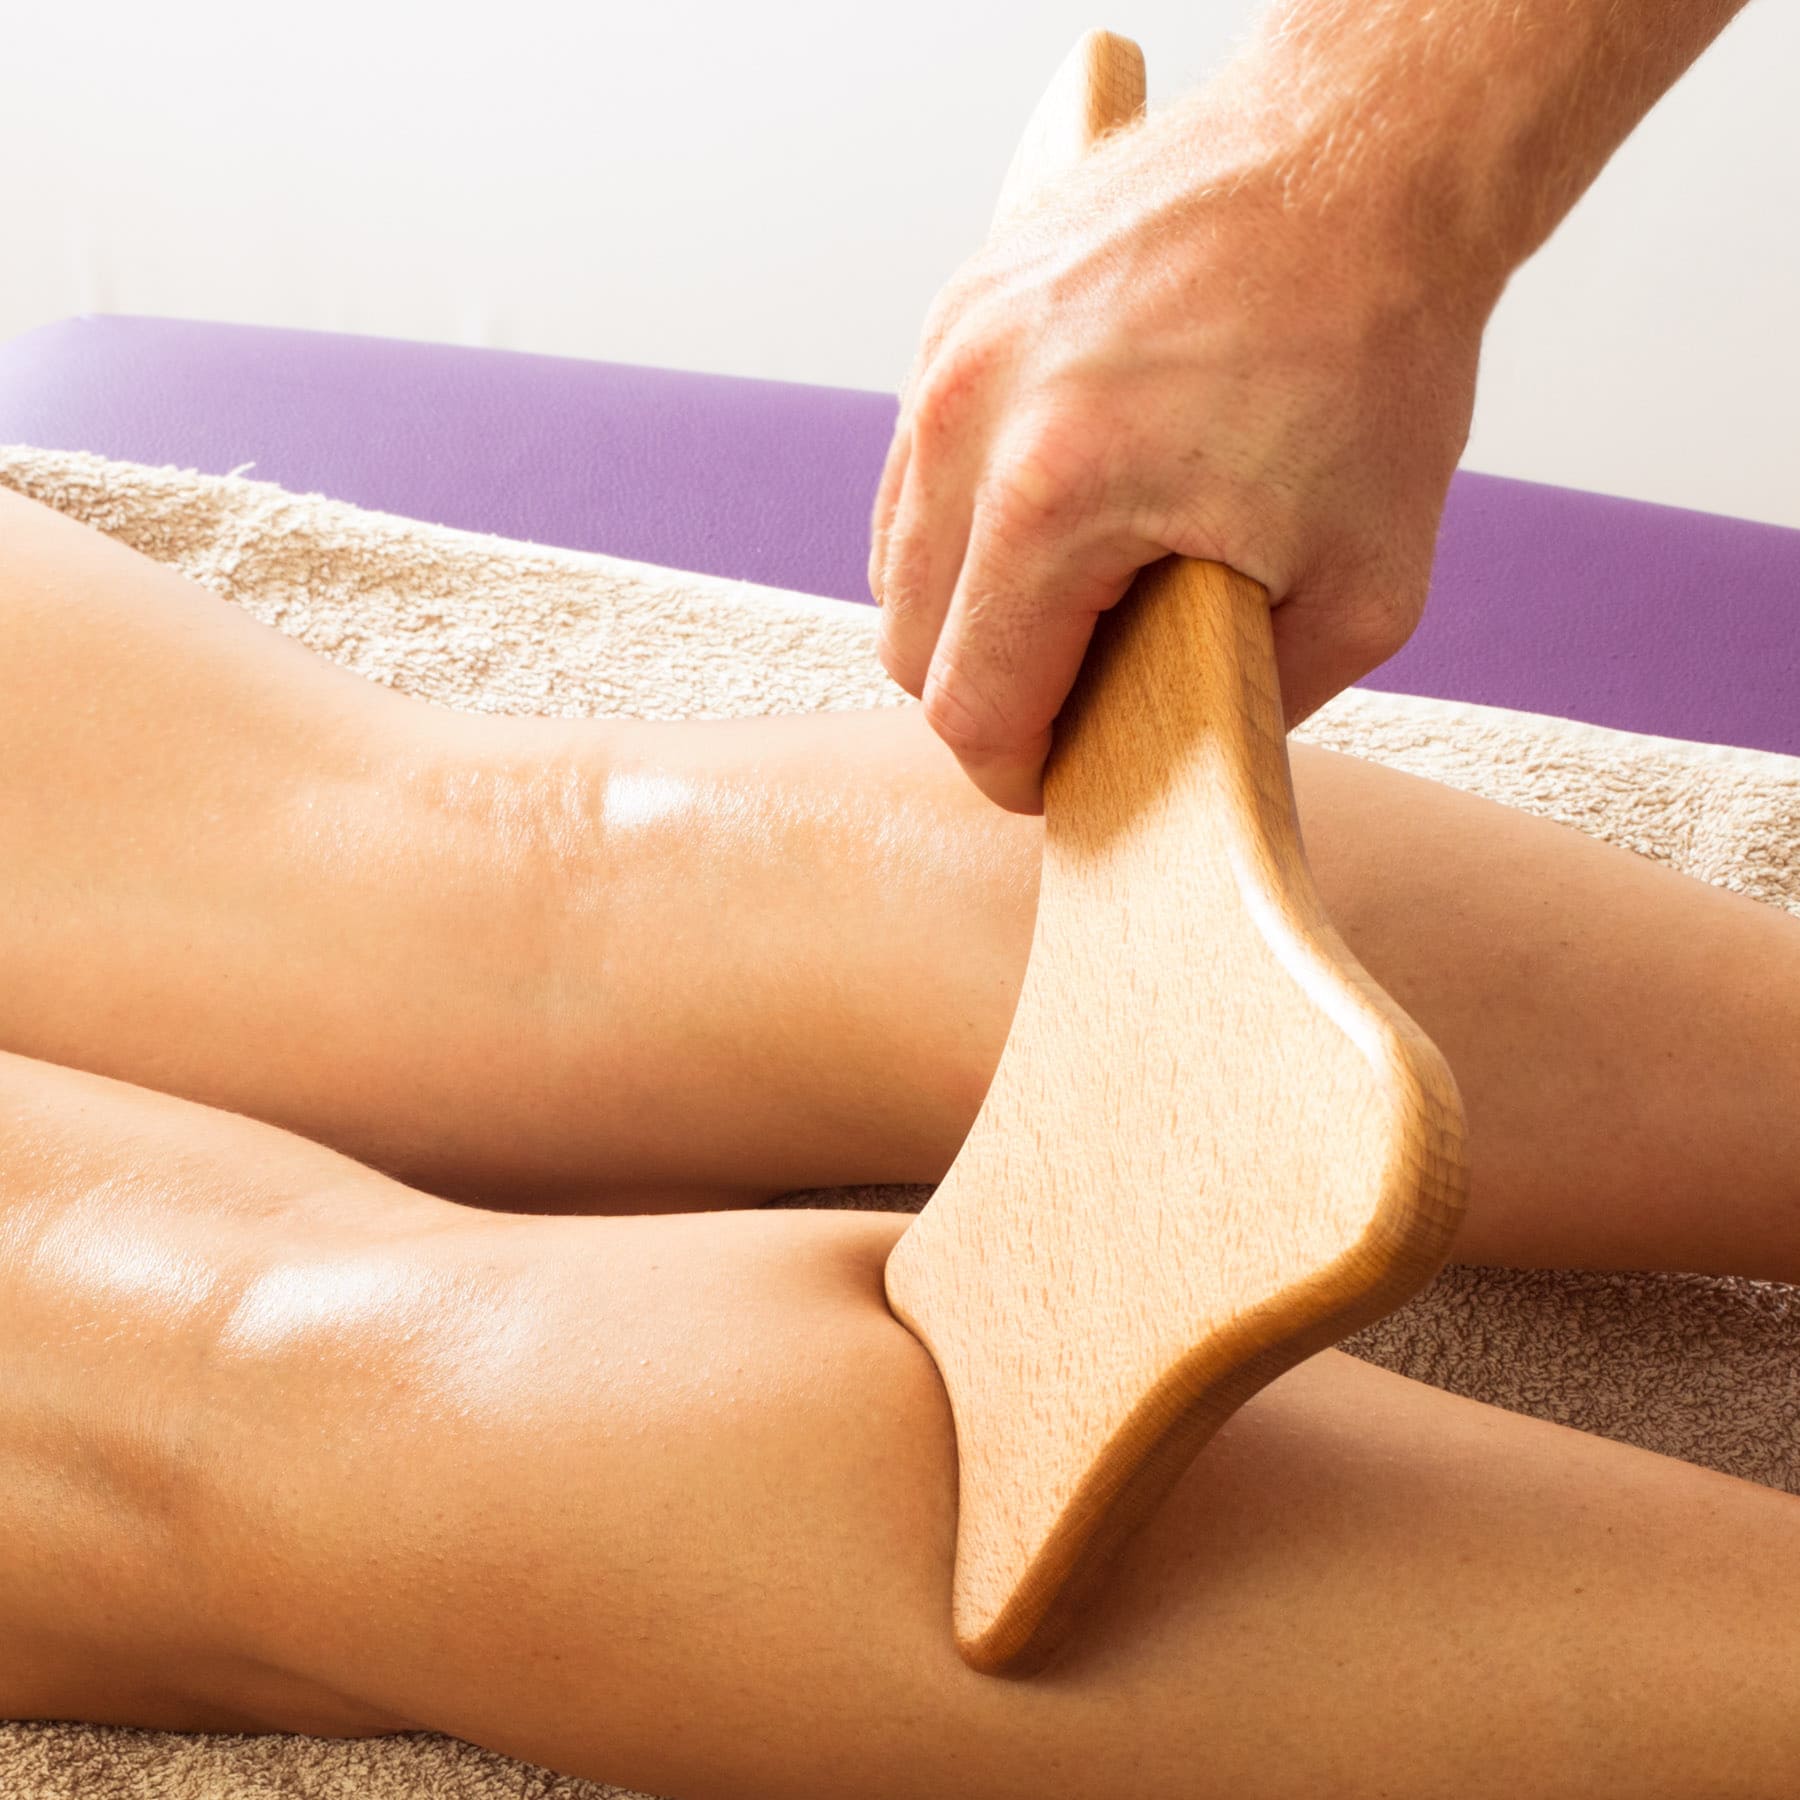
| Calves | Sit with the leg supported. Roll slowly over the broad muscle at the back and sides | Shinbone, Achilles tendon, back of the knee, swelling, bruises and raised or painful veins |
| Thighs | Use broad strokes over the front, outer or back muscular area | Kneecap, groin, hip bone and irritated skin |
| Hips and glutes | Roll over the broad outer hip and glute muscles without twisting | Hip bone, tailbone, groin and sharp or radiating pain |
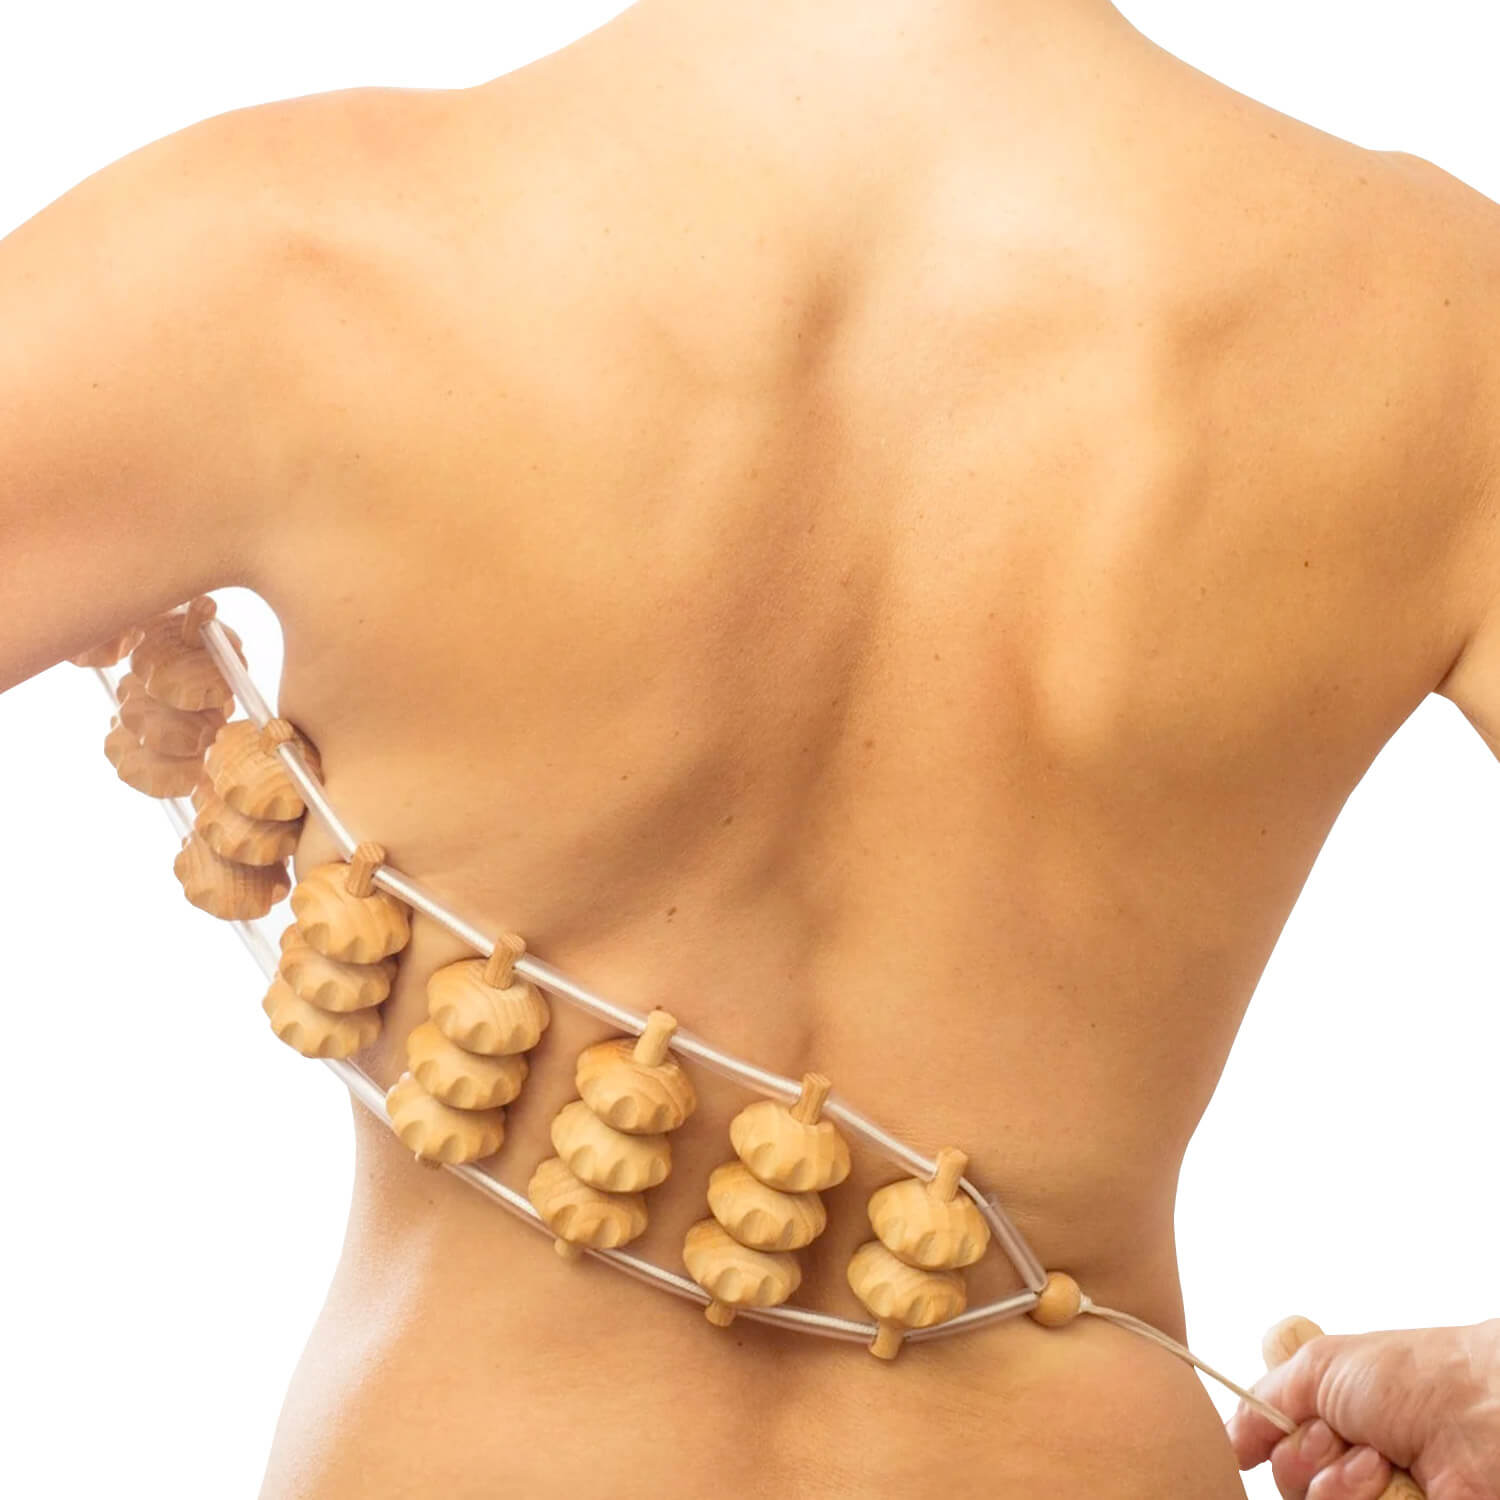
| Back | Use light pressure on reachable muscles beside the spine | Spine, shoulder blades, ribs and other prominent bones |

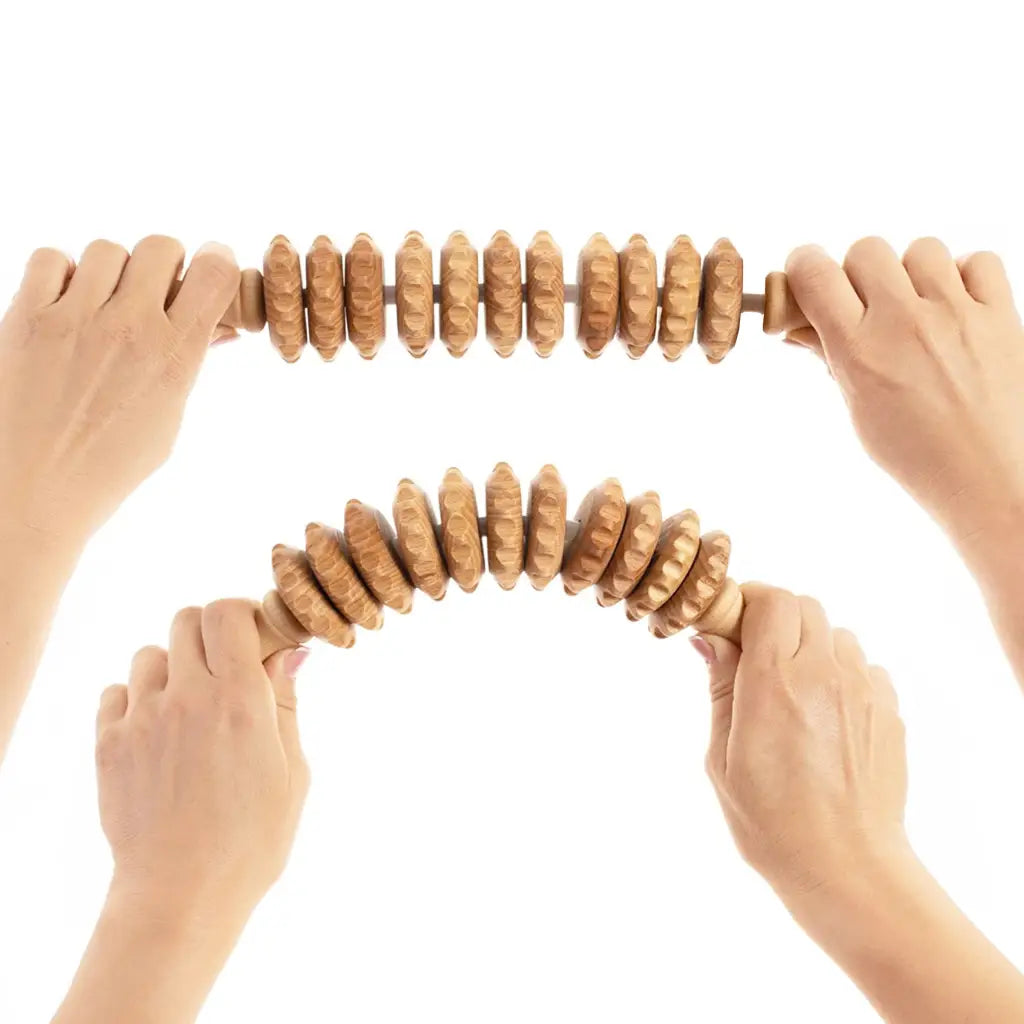
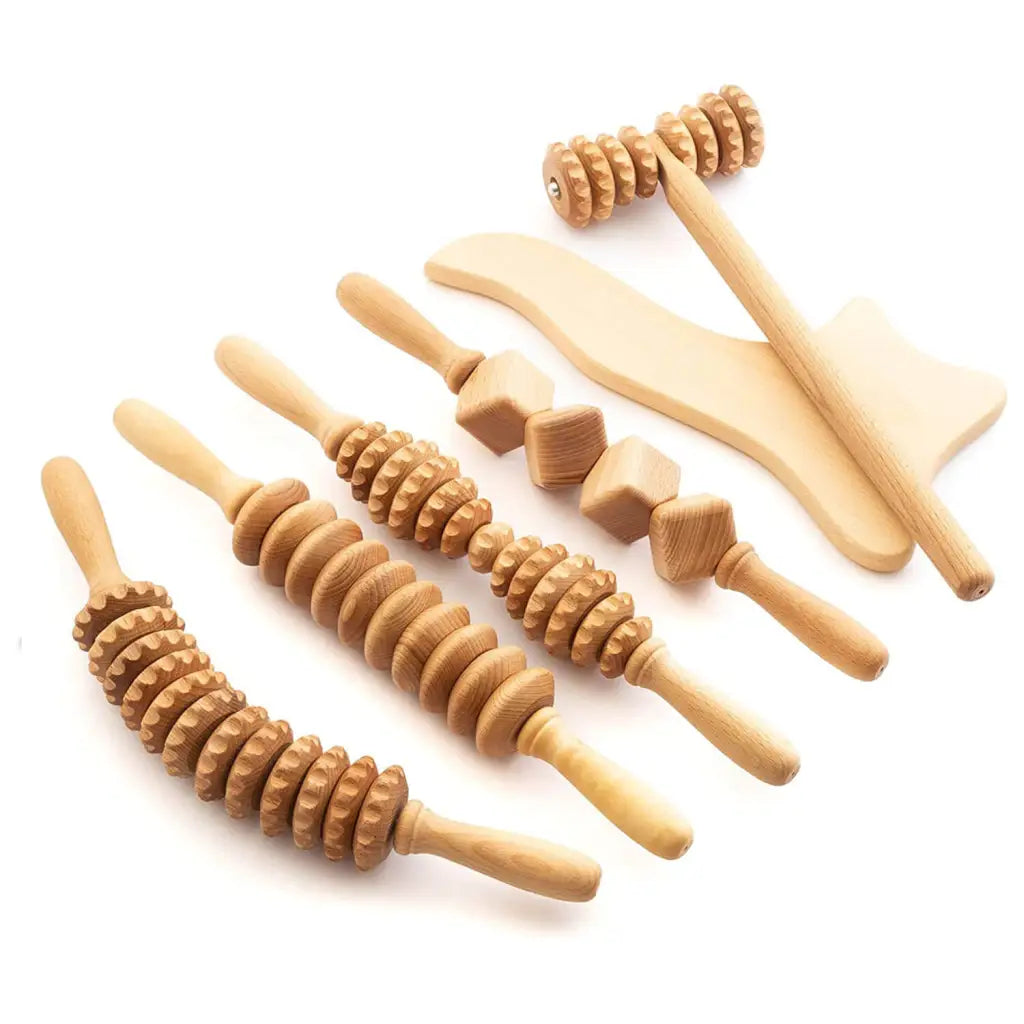
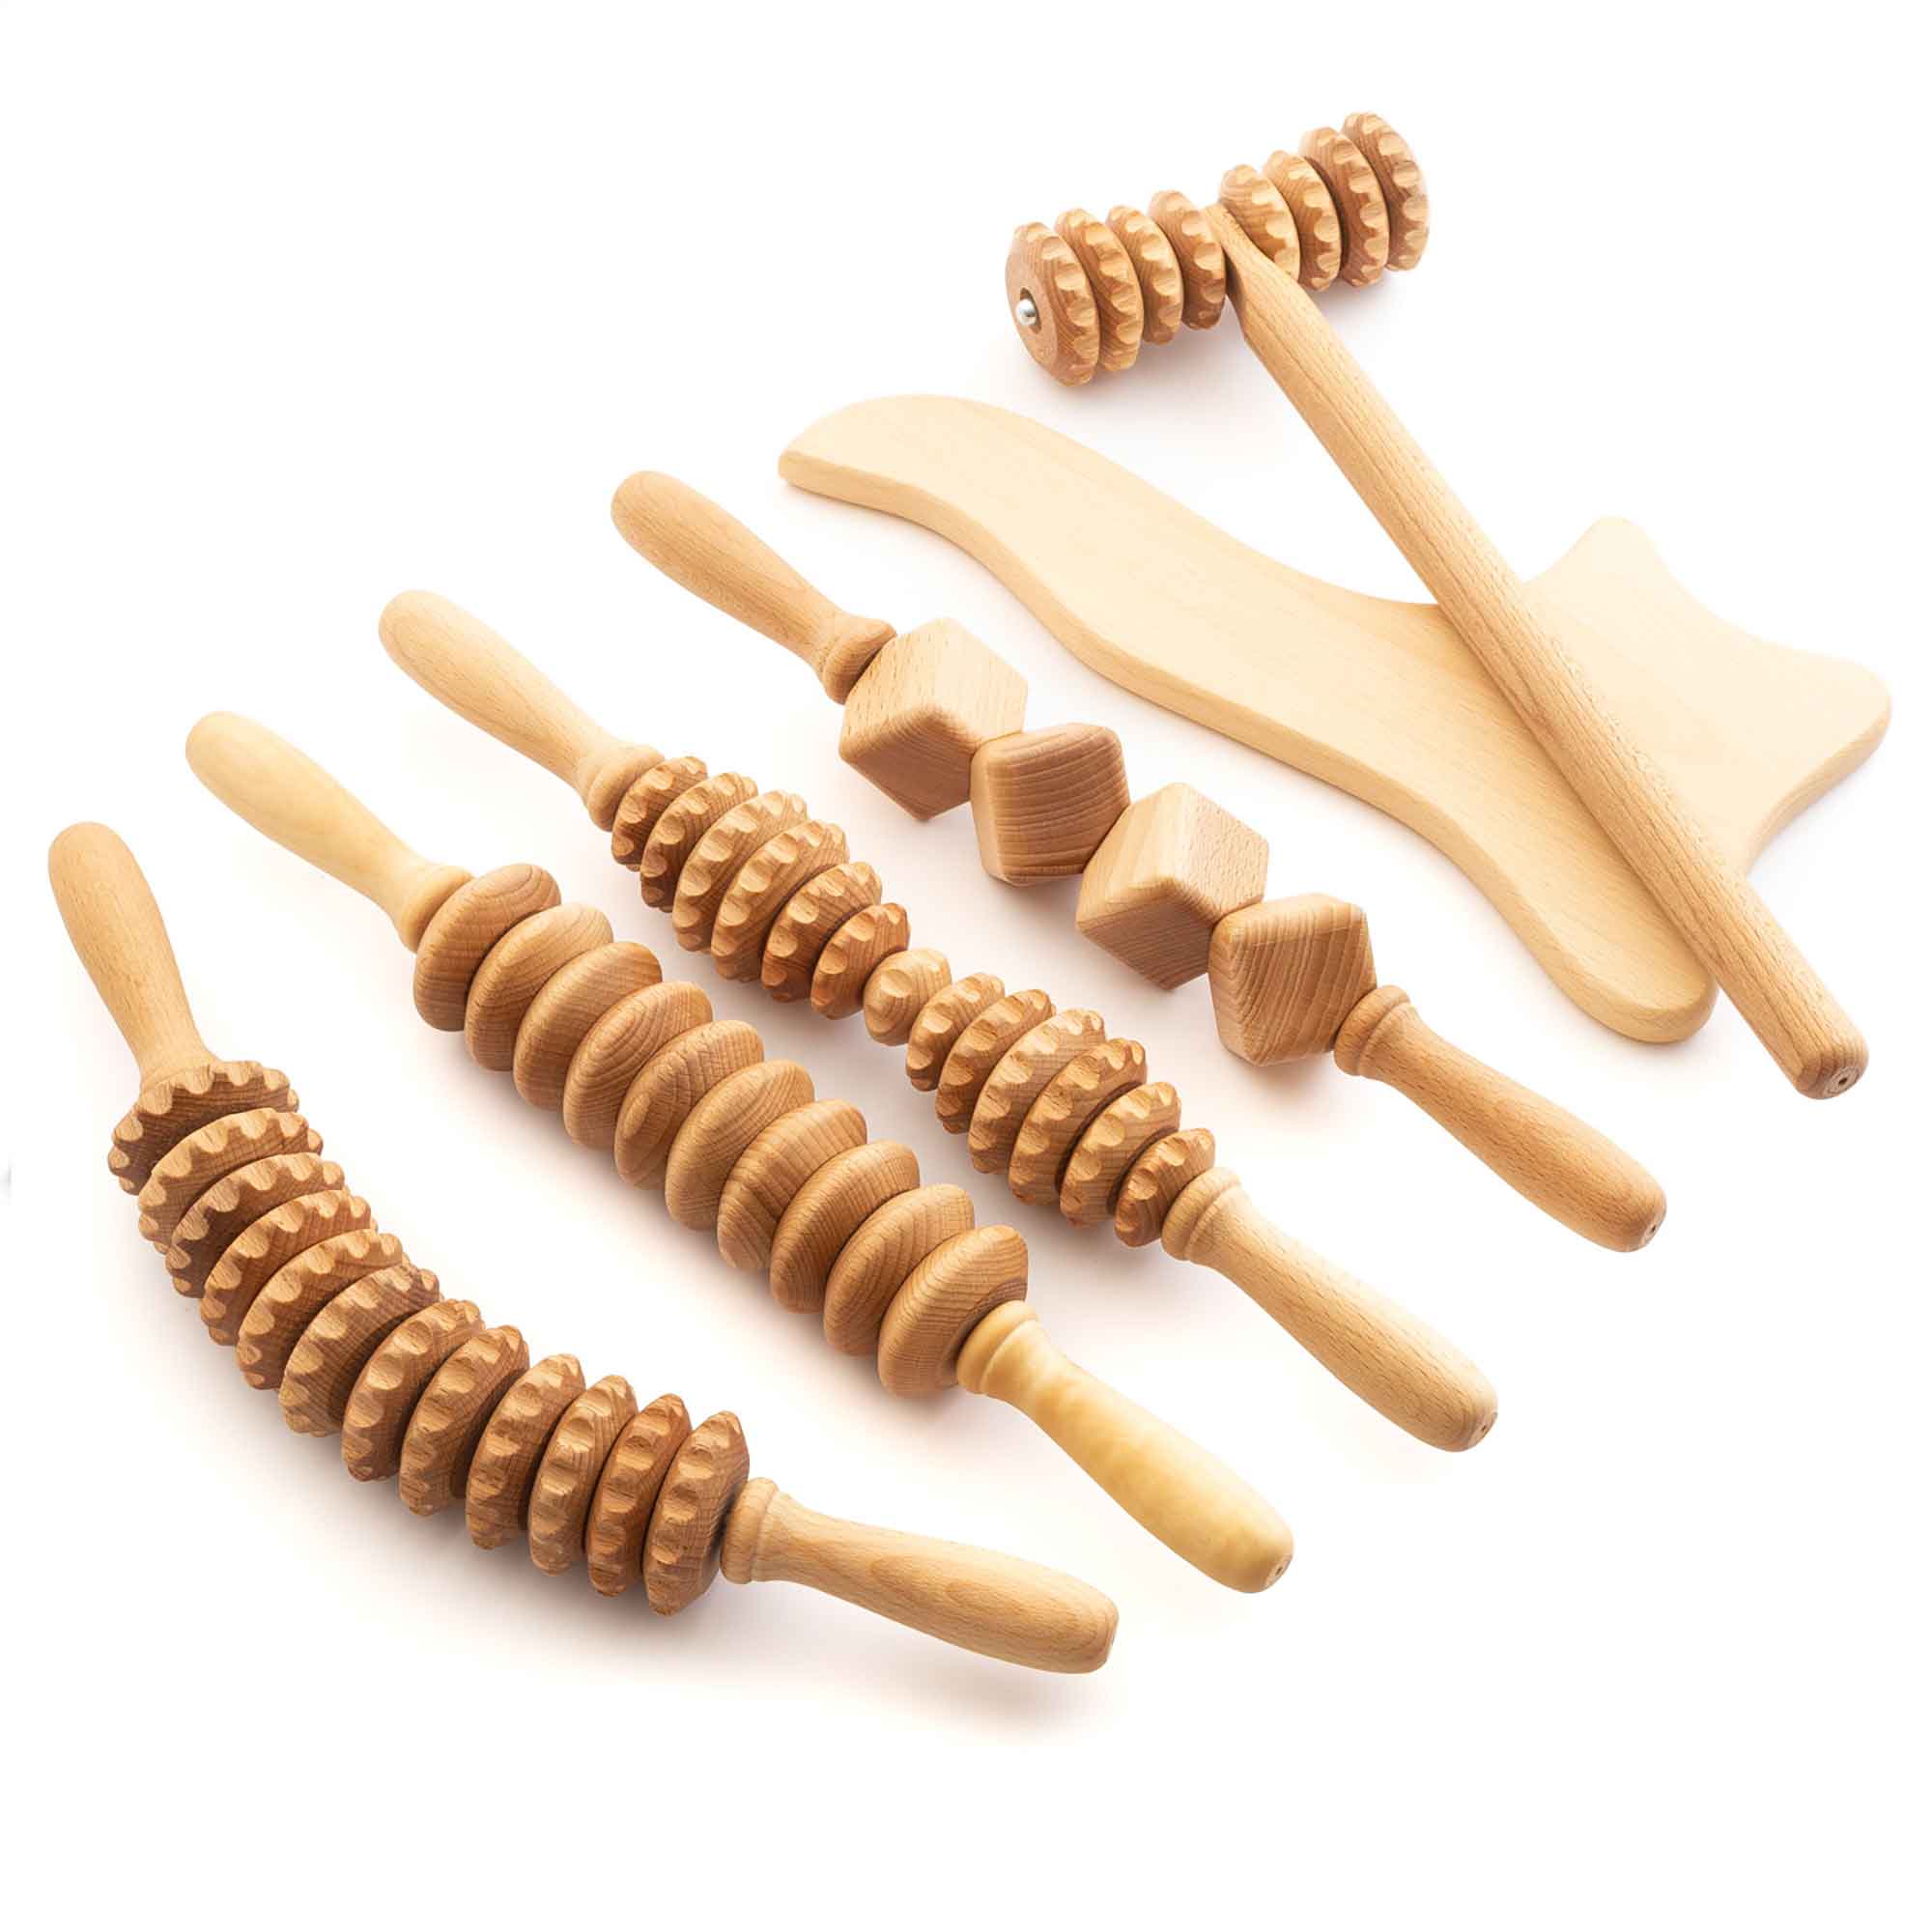
A straight roller gives predictable two-hand control. A rigid curved roller follows a fixed contour, while a Flexi roller adapts through its segmented construction. Both may maintain contact more easily around thighs, hips and glutes.
Reach still matters. Do not force a short roller into an awkward back position. A wooden rope back massager can be easier when reach is the main problem. Persistent, severe or unexplained pain needs professional assessment rather than harder self-massage.
Common beginner mistakes
- Starting too firmly. Begin lightly so you can assess both the area and the roller surface.
- Rolling too quickly. Slow movement makes the pressure easier to control.
- Crossing bones or joints. Keep the tool on broad muscular areas.
- Using the same pressure with every surface. More pronounced textures need less starting pressure.
- Applying too much oil or lotion. Excess product can reduce grip and control.
- Continuing when discomfort increases. Pain, numbness, bruising or swelling are reasons to stop.
- Changing everything at once. Increase only one of pressure, time or frequency, and only when the previous routine remained comfortable.
- Soaking the wooden tool. Wipe it clean and let it dry fully.
How technique changes by roller design
Different designs change contact and handling. They do not prove different medical or body-changing results.

| Roller design | Practical difference | Technique adjustment |
|---|---|---|
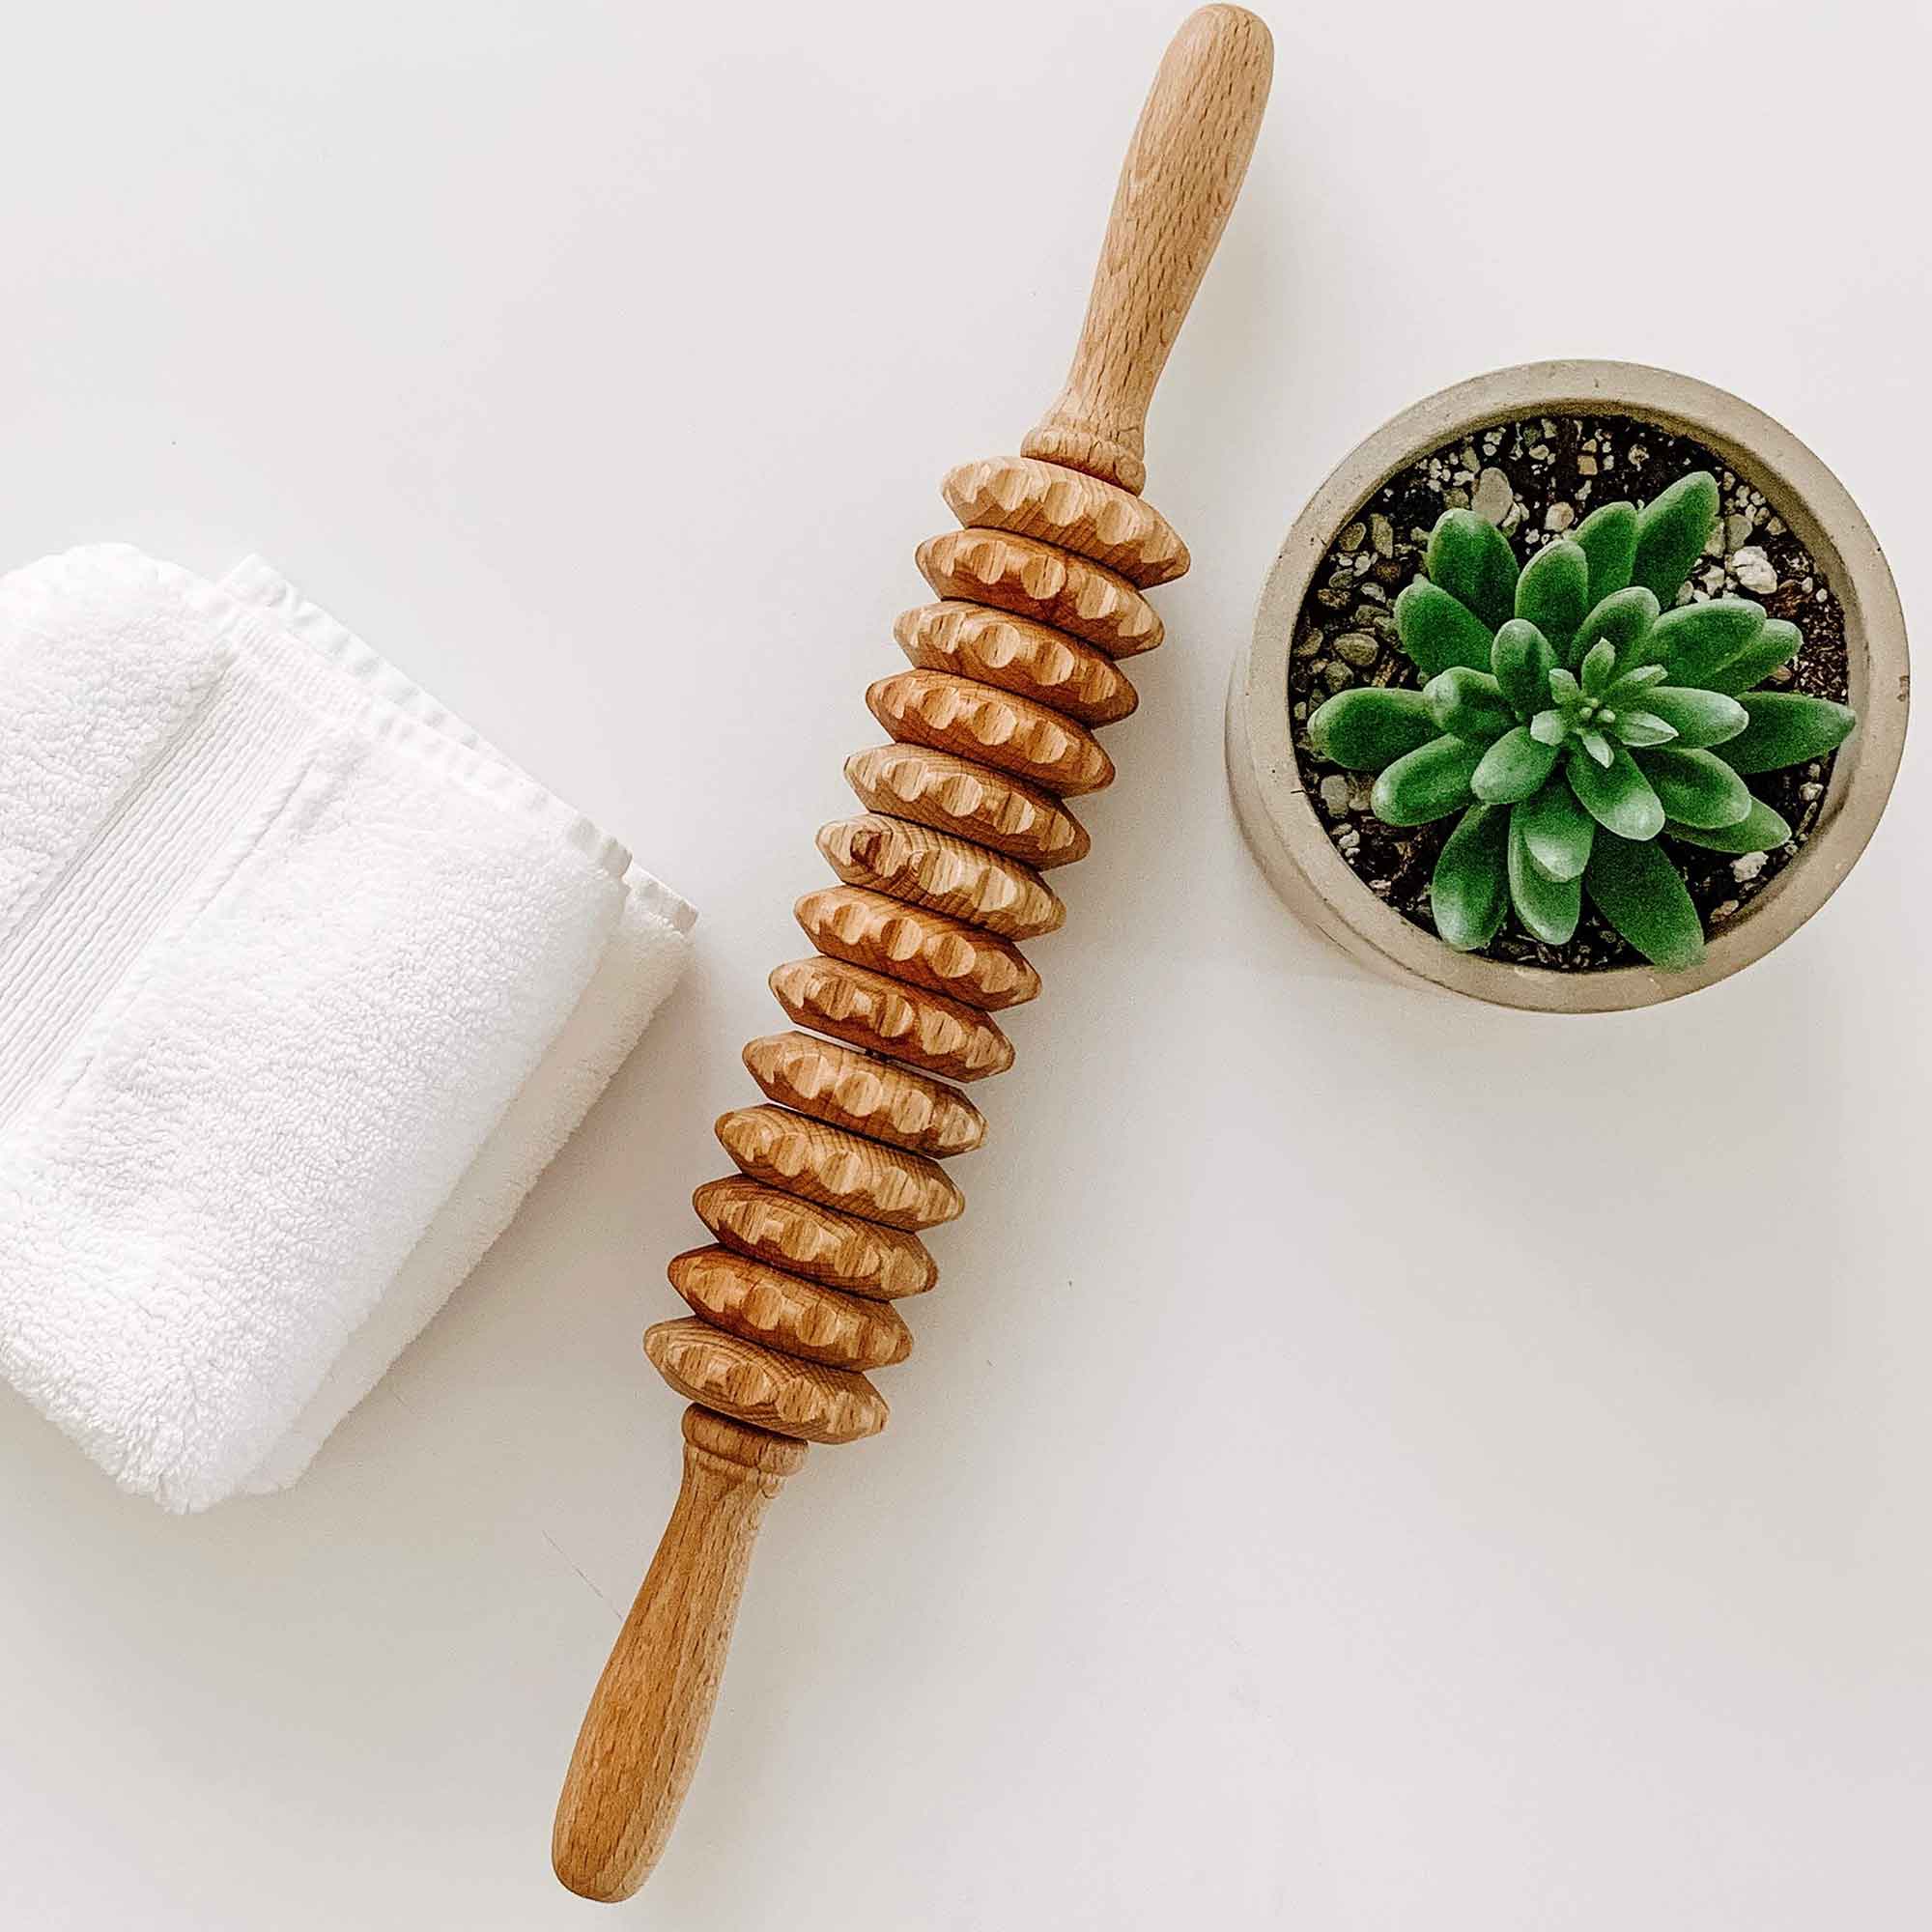
| Classic straight 40 cm roller | Broad, predictable contact with two-hand control | Keep the frame level and use even pressure with both hands |
| Rigid curved 40 cm roller | Fixed curve follows rounded areas more closely | Use where the shape helps maintain contact. Do not expect the frame to bend |
| Flexi 40 cm roller | Segmented construction adapts around larger contours | Let it follow the area and keep both hands balanced |
| Oval, Ball and Disk surfaces | Smoother or more regular segment contact | Use a light-pressure test and choose by preferred feel, not promised results |
| Dice and Body surfaces | More pronounced surface feel | Start with the lightest pressure and a shorter test |
| Rope back massager | Long handles prioritise reach | Use light, even pressure across broad back muscles and avoid the spine |

Browse the wooden massage roller collection to compare shapes. For a wider overview, read Types of Wooden Massage Tools.
Should you use massage oil or lotion?
Oil or lotion is optional. A small amount of a suitable product can improve glide on bare skin, and Tuuli wooden rollers can be used with either when the tool is cleaned and dried correctly afterwards.
- Apply a small amount to the skin, not directly to the roller.
- Use only enough to prevent uncomfortable dragging.
- Keep the handles and your hands dry enough for a secure grip.
- Choose a body product suitable for your skin and follow its instructions.
- Stop if the skin stings, burns, itches or develops a rash.
- Wipe residue away promptly and let the wood dry fully.
Thin clothing is another option. Avoid thick seams, buttons and zips that interfere with movement.

Remember
Start light. Stay relaxed. Stop before discomfort becomes pain.
When should you stop or ask for advice?
Stop for sharp or increasing pain, numbness, tingling, burning, marked or persistent redness, bruising, swelling, dizziness or a skin reaction.
Do not use the roller over broken or irritated skin, fresh injuries, unexplained swelling, painful or raised veins, areas with reduced sensation, or anywhere pressure feels unsafe.
Ask a qualified healthcare professional before use if you have had recent surgery, take medicine that increases bleeding or bruising risk, are pregnant, have a condition affecting sensation or circulation, or are unsure whether massage is suitable. Read Who Should Avoid Wood Therapy Tools for the fuller Tuuli safety guide.
The NCCIH massage safety overview notes that massage generally has few risks when used appropriately. It also reports rare serious effects, particularly with vigorous massage or in people at increased risk.
How to clean and store the roller
- Wipe the tool after every use with a dry or slightly damp cloth.
- Remove oil or lotion residue promptly.
- Do not soak, rinse under running water or machine-wash it.
- Let the wood and moving parts dry fully.
- Store it in a dry place away from prolonged moisture and direct heat.
- Inspect the surface, handles, joins and movement before the next use.
- Stop using it if the wood becomes cracked, splintered, rough, loose or unsafe.
Follow the care instructions for the specific product. Where permitted, condition the wood occasionally with a small amount of suitable natural oil.
What results should you realistically expect?
A wooden massage roller gives you direct control over contact, pressure and movement. That control is the main practical value: you can keep the routine short, adjust the feel immediately and stop as soon as the area no longer feels comfortable.
It is not a medical device or a treatment for pain, injury or a health condition. Tuuli does not claim that a roller drains lymph, detoxifies the body, removes cellulite, breaks down fat, guarantees improved circulation or reshapes the body.
For a fuller evidence and product-selection overview, read Wooden Massage Roller Benefits: What They Can and Cannot Do. For cellulite-specific questions, read Do Cellulite Rollers Work? Evidence, Safety and Realistic Expectations.
Frequently asked questions
How do I know I am pressing too hard?
The pressure is too high if you brace, hold your breath, lose control of the return stroke or feel sharp pain, burning, numbness or tingling. Bruising and swelling are also reasons to stop.
How long should a beginner use the roller?
Start with about one minute on one area. Continue for up to two minutes only if it remains comfortable. One or two areas are enough for a first routine.
How often can I use it?
Check the area later that day and the next day for delayed soreness, irritation or bruising. Brief regular use may be reasonable when comfortable, but daily use is not required.
Should I use massage oil or lotion?
Either can be used when suitable for your skin. Apply a small amount to the skin, keep the handles secure, wipe the roller afterwards and let it dry fully.
Which roller is easiest for beginners?
A classic straight 40 cm roller is often the simplest starting format. A curved roller suits rounded areas, while a Flexi roller adapts around larger contours.
Can I use it after exercise?
Use it only when the area is comfortable and there is no fresh injury, unexplained swelling or sharp pain. Start lightly and keep the session short.
Can I use a wooden massage roller on sore muscles?
A short, light-pressure routine may feel comfortable on mild, general muscle soreness. Do not roll over sharp pain, swelling, bruising, a recent injury or pain that is getting worse. Stop if the area becomes more painful or unusually sensitive, and ask a qualified healthcare professional for advice if you are unsure what is causing the soreness.
Can I use it before bed?
Yes, when a short, gentle routine feels comfortable. There is no need for stronger pressure or a longer session at night, and the roller is not a guaranteed sleep aid.
Should my skin turn red?
A little temporary warmth or light redness may occur from friction. Marked, painful or persistent redness, bruising, swelling, burning or irritation are reasons to stop.
Can I use it on my back by myself?
Use a handheld roller only on reachable muscles beside the spine, with light pressure. Avoid the spine, shoulder blades and ribs. A rope back massager is easier when reach is the main problem.
What direction should I roll?
Use slow back-and-forth strokes in a direction that maintains comfortable pressure and control. There is no universal requirement to roll towards the heart.
Should it hurt?
No. Sharp pain, burning, numbness, tingling, bruising or swelling are reasons to stop. Pain is not proof of effective use.
Can it remove cellulite?
Tuuli does not claim that a manual wooden roller removes cellulite, breaks down fat or permanently changes body shape.
How do I clean it after using oil or lotion?
Wipe residue away promptly and let the tool dry fully. Do not soak, rinse or machine-wash it.
A simple rule to remember
A wooden massage roller does not need force or a long session to become a useful part of a self-care routine. Strong pressure is easy to notice; good control is easier to overlook.
Most beginners gain more from slow movement, a secure grip and consistent technique than from pressing harder. Choose one easy-to-reach muscular area, keep the first session short and use only the pressure you can control without pain, bracing or bruising.
Specialist review

Reviewed by Gorazd Slavinec
Massage therapist at Spina masaža
Gorazd Slavinec has worked in massage practice since 2010. His work includes manual massage techniques and the practical use of different massage tools.
Review scope: Gorazd reviewed the complete article, including pressure, timing, frequency, body-area guidance, safe-use limits, the mild muscle-soreness answer and the technique shown in all three product demonstrations.
Review date: 28 July 2026
Professional profile | Spina masaža website | Facebook | Instagram
Tuuli wooden massagers are manual wellness products, not medical devices. This article provides general product and self-care information and is not medical advice.

Written by Peter Čuček
Tuuli author bio
Tuuli blog and product-support content is prepared under the Tuuli editorial workflow and published by Peter Čuček, store owner of Tuuli, where applicable. The goal is to help customers choose, use, clean and store wooden products with accurate product facts, clear safety language and practical buying guidance.
Who writes Tuuli product-support and blog content?
Tuuli content is written and maintained by the Tuuli team, with product and brand context from Tuuli GmbH. Content focuses on real product details, materials, dimensions, care instructions, personalisation options, shipping, returns and customer support.
Editorial review process
- Product facts are checked against current Tuuli product information before publication.
- Internal links point to relevant products, collections, support pages and policy pages.
- Wooden massager and self-care content is reviewed for safe, non-medical wording.
- Selected wooden-massager and self-care pages include additional specialist content review where relevant.
Editorial focus
- Clear product fit: what the product is, who it is for and what is included.
- Material, dimensions, care and use guidance based on product information.
- Safe wording for wooden massagers and self-care tools.
- Internal links to relevant products, collections, instructions and support pages.
Contact and corrections
If a product detail, guide or support answer looks unclear or outdated, contact Tuuli at info@tuuli-shop.com. We review content updates against current product information and store policies.
Where to learn more
Learn more about Tuuli on the About page, check company details in the Impressum, browse the instructions page or visit the contact page if you have a product question.